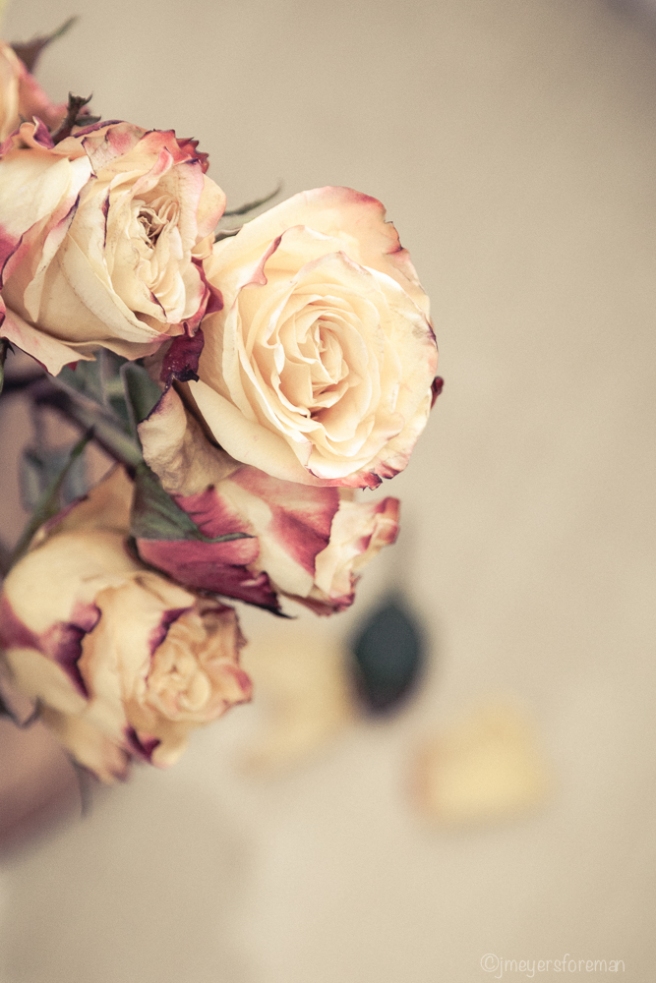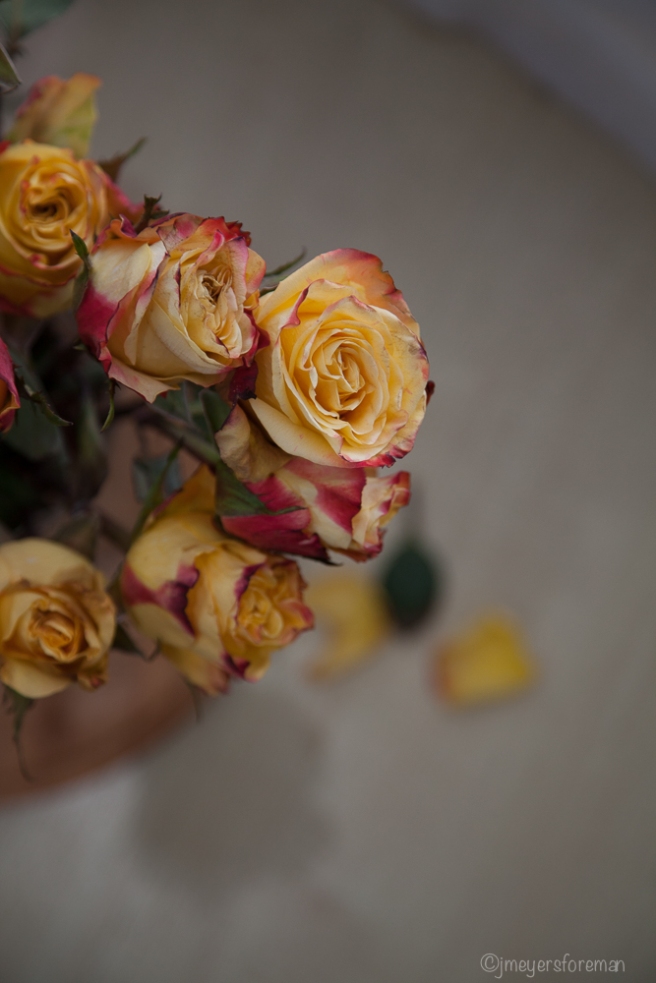
It’s Friday, and that means another After-Before Friday Blog Post, I am becoming a regular contributor to Stacy’s After-Before Friday Forum, were photographers share they photographs and their working process. For some, or at least me, it is an opportunity to read and learn some new Photoshop or Lightroom skills. The photographers who submit to Stacy’s forum range in skill level from novice to those with advanced skills. The one thing I have learned is there is more than one way to process an image, and personal style is more likely to affect the final results as software! Each photographer has a unique way of looking at the photos and deciding the final outcome and I never fail to learn something, mostly keep it simple!
I have been taking an on-line still-life course with Kim Klassen, she has provided the inspiration for this weeks post. The florist down the street had these beautiful roses for sale! Kim’s Friday blog is Friday Finds, it is all about the week and what she has found this week. I am going to give a shout out to her this week as well, as I have found her on-line course very inspiration, and I have used one of her Lightroom presets on the image. But let me start from the beginning. Above, the image I ended with, below, the image I started with…..

The work on this image was done in Lightroom, I love that, because I can go back through my history panel for details, it makes learning, and writing this blog post so much easier! First I cropped, that is pretty obvious. In the Basic Develop module I went to my auto button. I like to do this, sometimes Lightroom is right, and there is little to do after that.
For this image I also moved the Highlight slider to -24, then added a preset from Kim-Klassen called kk_truegrit. This preset does affect the exposure, contrast, whites and blacks as well as clarity. Presets are a good way to establish a style or a particular look if you want a cohesive look for a group of photos, and to automate your workflow.
Next I moved down to the Lens Correction Module to enable lens profile and remove chromatic aberrations, added a little post-crop vignette, and I was satisfied with the outcome.
Stacy’s After-Before Friday Forum has links to several great photographers and you can read more “how it was done” type posts, and Stacy usually has a video showing her workflow, if this interests you. I always learn a something from the contributors.
If still-life, textures and presets is something you want to learn more about head on over to Kim Klassen’s Cafe.
My Friday find: beautiful roses, and learning about presets and how to use them in Lightroom. I hope your week has been a good one, and you get to spend time being inspired this weekend.
Share your thoughts with us, in the comments box below,
remember to share with your friends if you think they might be interested.
Beautiful processing, but then you started with a great shot. I can almost smell the roses!
LikeLiked by 1 person
HI Emilio, it is nice to hear like the image and the processing.
LikeLike
gorgeous flowers
LikeLiked by 1 person
thanks tiarsandtantrums, the beautiful flowers always inspire me to pick up my camera!
LikeLike
Just beautiful. The editing really makes the roses stand out even more.
LikeLiked by 1 person
thanks Mary, It is nice to hear you like the images and that the editing was effective!
LikeLike
Hi Mary, so nice to hear you like the image and the editing that was done.
LikeLike
Really nice processing I like how it has created creamy white highlights and created a calming colour palette.
LikeLiked by 1 person
thanks Ben, it is so nice to hear you like the image.
LikeLike
Janice, I’m so glad you got this into this week’s gallery. I love the creamy, dreamy effect of the after image, and really appreciated the tip about using presets to create a consistent look for a gallery of images. Brilliant! The photo is just so lovely – it could be the cover of a romantic Valentine’s Day card 🙂 And thanks for all you kind comments and information about ABFriday!
LikeLiked by 1 person
Hi Stacy, thanks for your kind comments, I am so happy to hear you like the image, Harlequin Romance here I come! I am honoured to be amoung your group of after-before contributors. I have learned so much from everyone! talk to you soon.
LikeLiked by 1 person
LOL – Harlequin Romance 😀 Have a great weekend, Janice!
LikeLike
Janice this is a lovely image and I really like your process. The roses look similar to Double Delight which is one of my fave roses, creamy petals edged with crimson but its not a florist rose but smells divine.
One comment that I found the large black splodge – possibly a leaf – right in the center of the image VERY distracting, the petals not so much as they are artistically dropped off the roses, but yes the dark thing was the first thing I looked at!
Great job, I will check out Kims site, I have some of her textures from my PS Grunge course.
LikeLiked by 1 person
hi Lensaddiction, thanks for taking time to comment, the dark spot is a leaf, and the leaft does become a bit of a black hole that I will have to revisit. I will try not to get lost in it though as I make revisions!!! take care, I hope you will visit again soon.
LikeLike
Hi Janice I know exactly what you mean about getting so wrapped up in things that you lose that necessary outside perspective.
It makes my recent and possibly controversial post about honest feedback so much more important!
I’m interested in your thoughts on Kim Klassens classes, I had a quick look online but its always more informative to get real opinions. Anything you might share would be appreciated, I am always keen for good quality learning opportunities and the difference in your AB images shows it might be worth investigating 🙂
LikeLike
hi, send me an email, and I will tell you a little more about Kim’s on-line class.
LikeLike
Oh, that first image –absolutely GORGEOUS!
LikeLiked by 1 person
thanks Buckeroomama for you kind words
LikeLike
Great processing. I like how it gave a vintage feel. All in lightroom? Impressive. I still have yet to get a look like that on my own besides the basic clean edits. Nice results.
LikeLiked by 1 person
Hi Lisa, so nice to hear you like the image, I have only been using Lightroom for a short time, so I am no expert, but it seems we can do all the same edits as Camera Raw, and then some, plus it has many other features. The Adobe website has many great video for learning! good luck, I hope you will visit again soon.
LikeLike
Oh this is beautiful Janice and thanks for the links!
LikeLiked by 1 person
thanks Robyn, I hope you find the info helpful.
LikeLiked by 1 person
Gorgeous images, the roses are splendid and your post-processing is spot on.
LikeLiked by 1 person
thanks Snow, It is nice to hear you like the images.
LikeLiked by 1 person